Category Archives: Uncategorized

Fully LOADed

Well, I made it. Actually I made a lot. Two twenty page mini albums, 28 more layouts, 5 of which were double paged, for a total of 73 pages done. That’s 131 photos out of my storage albums and onto pages. I need to push myself like this more often. How’s February sound? Anyone want to join us? I’ll be sure to let you know when that starts getting organized.

Anyway, here’s the rest of my LOs for the month.

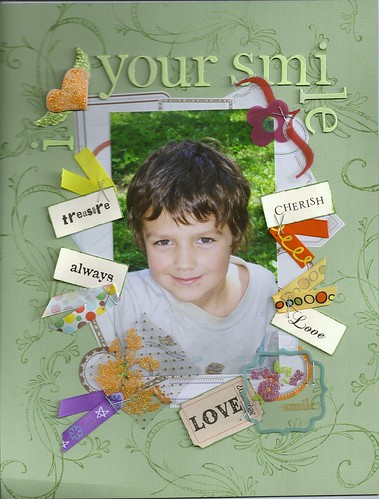
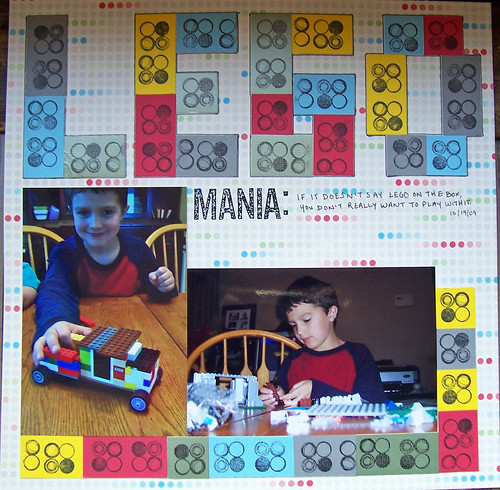
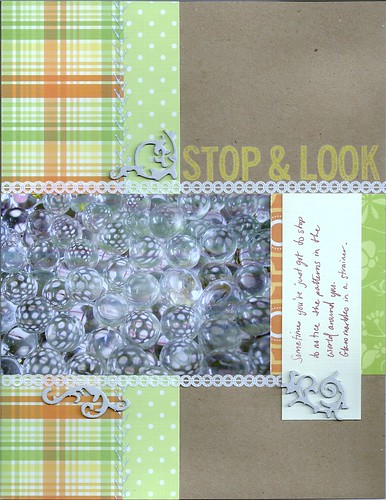
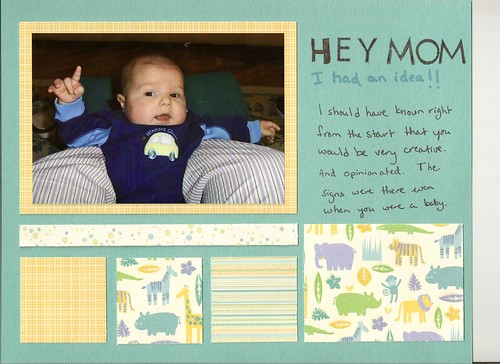
I was feeling rather worn out and sicky, so I thought about just slapping a photo on some cardstock and calling it done. Then I thought, what about using labels to make a photo mat, and it just snowballed from there. This has an awful lot of stuff on it for a slap it on the page kind of day. Oh, and have I mentioned how much I love grungeboard and stickles? Cos I do.
LOAD Oct 28 2009

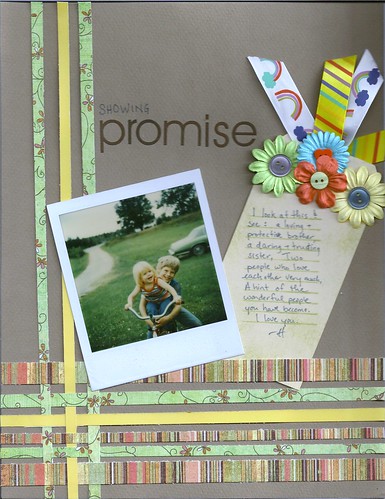
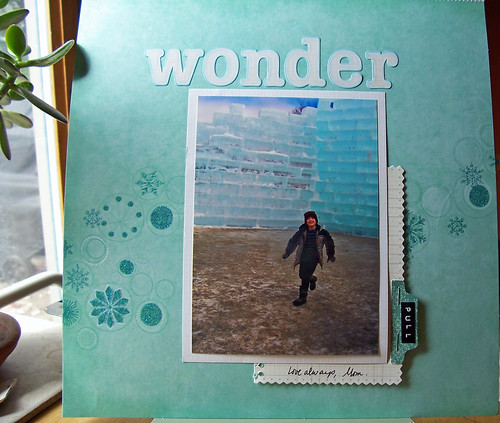
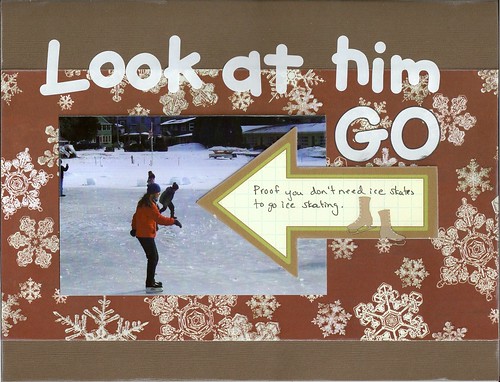
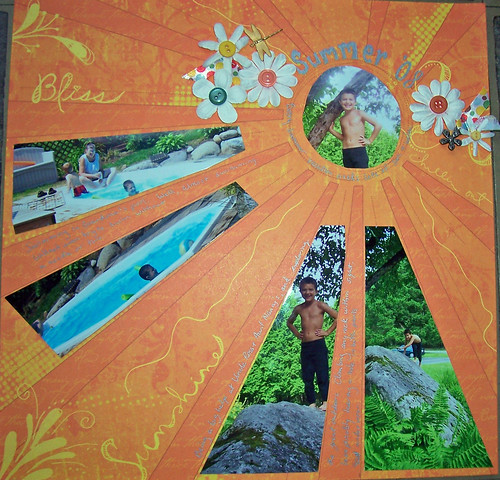
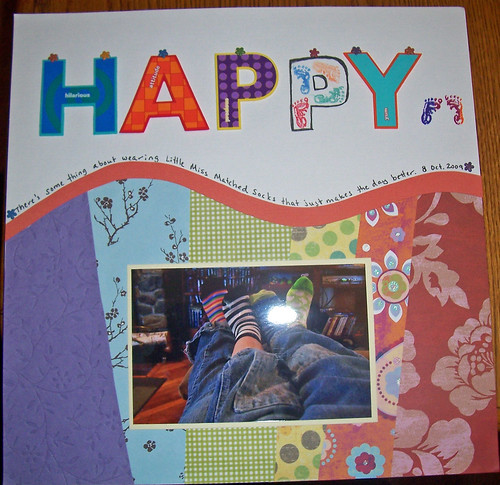
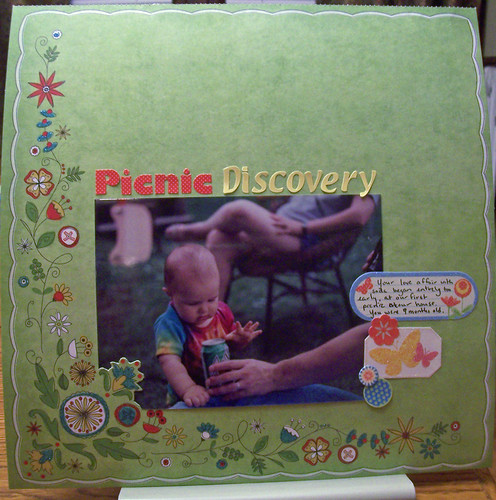
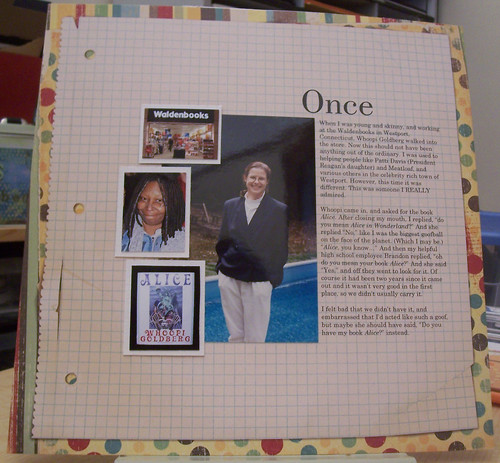
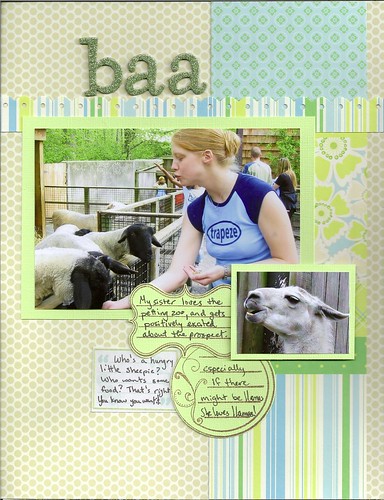
This photo has been sitting on my desk for weeks, calling me. I scanned it before I put it on the page, and then had fun weaving some patterned paper scraps together. I’m really loving these particular letter rubons. Getting them on clearance at AC Moore’s may have something to do with that.
LOAD Oct 29 2009

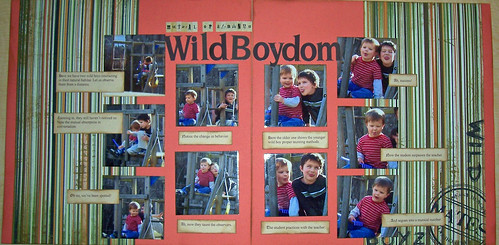
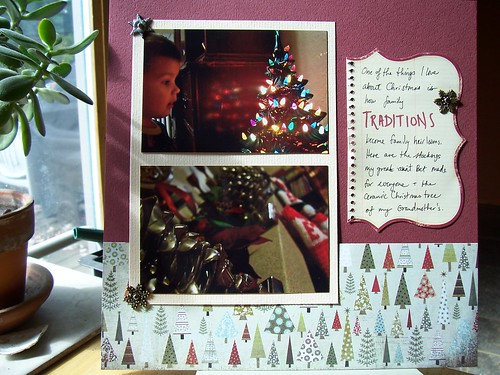
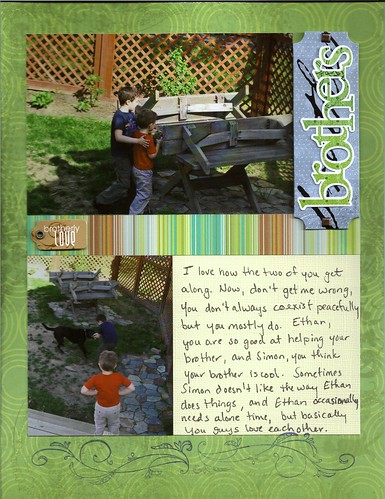
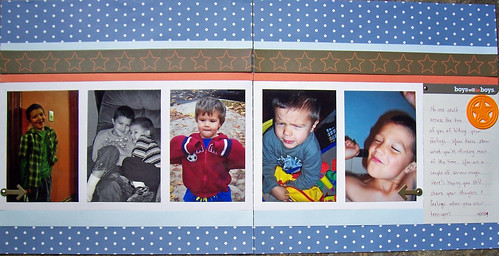
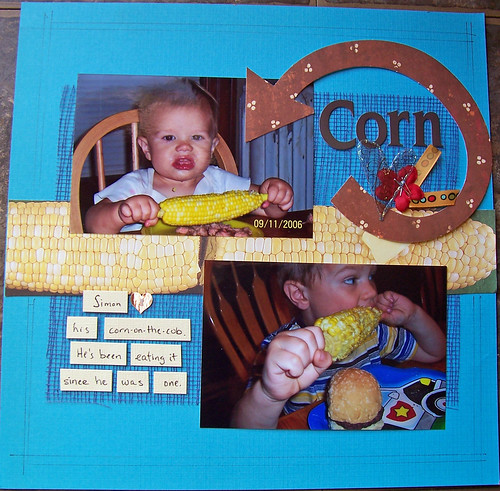
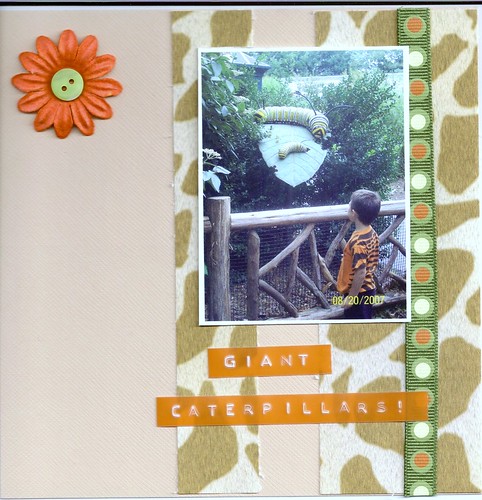
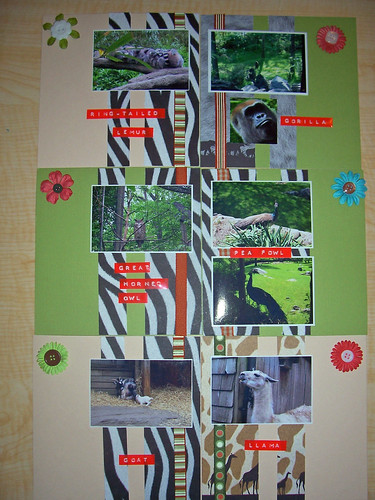
This is an inside joke for the adults; my kids will never know the pleasure of Mutual of Omaha’s Wild Kingdom. Since some days seem like I’m living in a zoo (Who am I kidding? Most days…) I thought the nature documentary style journaling would be appropriate.
LOAD Oct 30 2009
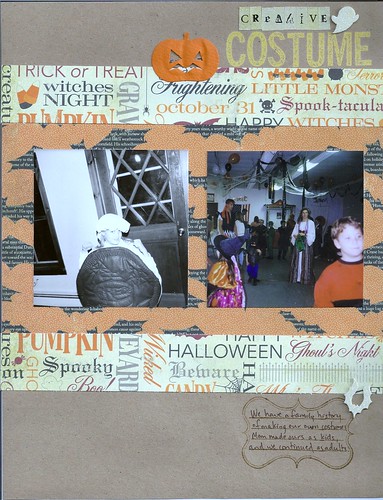
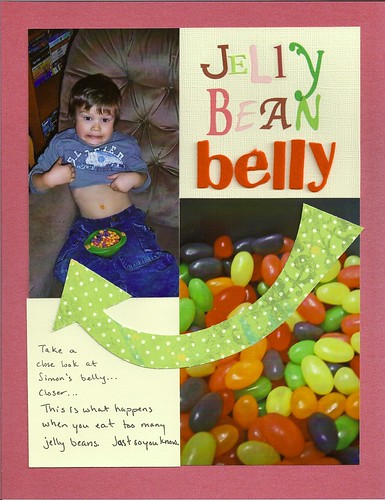
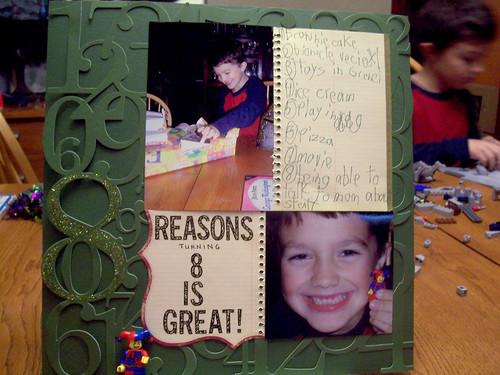
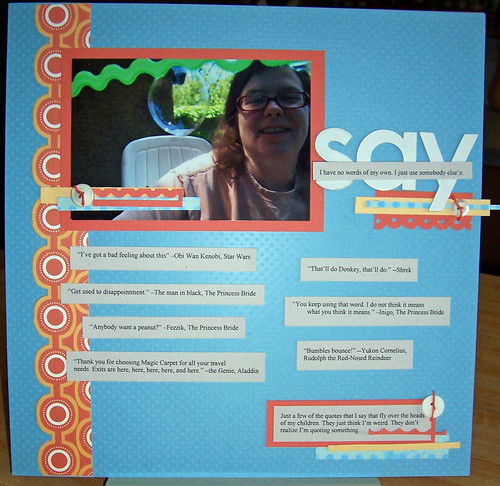
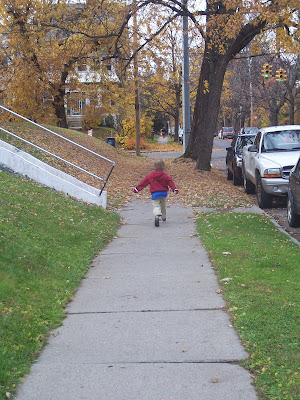
And here’s today’s page. I figured I’d do a Halloween page and get in the spirit. After all Halloween may be the most important holiday for us, since if it weren’t for a Halloween party thirteen years ago tomorrow, I wouldn’t have met my husband. He was a pseudo-french intellectual with the Communist Manifesto under his arm, and a cigarette in a cigarette holder. I was the night sky. We’ve been together ever since.
LOAD Oct 31 2009

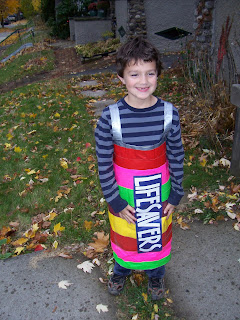
That’s all I’ve got for now. Look for a wonders of duct tape as costume material post soon. You too can be a GIANT roll of LifeSavers.

Heading Into the Home Stretch.

We’ve been rather busy lately, but I’ve managed to keep up with LOAD. I’ve been trying to keep it simple, so I can do other things, like dishes and laundry. You know–housework! You all know how much I love and enjoy that, right?
Anyhoooo….
This was my next page, one 5×7 and a mat only attached on two sides makes a cute pocket for some journalling. If you’re looking for something to say, writing a letter to the person in the picture is a good place to start. Love this kid.
LOAD Oct 15 2009

Another thing you can do, is to make a list of traditions or meaningful things, and then expand on that idea. I love this page. Not only are the photos okay, but I love all the product I ended up using. If I could use the Making Memories journalling cards on all my layouts I would be a happy woman.
LOAD Oct 16 2009

And I’m seriously loving all the pieces I ordered from Scenic Route. It’s really sad that they are going out of business.
LOAD Oct 17 2009

Another thing I’m really really enjoying is the Doodlin’ Around stack from DCWV. There’s a page for every season.
LOAD Oct 18 2009

This is not a great page from a design point of view, but it really carries the idea of legos well. I used paper strips and a circle stamp set to make the “legos.”
LOAD Oct 19 2009

I have had piles of brother themed stickers lying around for ages. I decided I should use them before my children are grown and out of the house.
LOAD Oct 20 2009

Simon’s been helping me by picking out photos to use. I’ve had a craving for jellybeans since I made this page.
LOAD Oct 21 2009

I got a book called Scrapbook Page Maps by Becky Fleck. There are all sorts of cool designs, but what I really like about the book is the set of cards in the back. I now have a deck of sketches for quick and easy reference and inspiration.
LOAD Oct 22 2009

Feeling no creativity, I used a kit from Creating Keepsakes Kit of the Month from a couple years ago, and took advantage of someone else’s creativity.
LOAD Oct 23 2009

And then I figured out which pictures I could use to go with this paper. The design of the paper totally dictated how I did this. I can see a few things I might have done differently now, but on the whole I like it.
LOAD Oct 24 2009

And then I made another mini-book. Twenty pages, most of them very, very simple.
winter water fun album
Here’s the title page:
LOAD Oct 25 water title page
And then we were back to Simon for inspiration, and a sketch from Page Maps. Love the arrow from Scenic Route, and the mesh paper has got to be at least five years old.
LOAD Oct 26 2009

One more Page Maps Sketch, and more of Simon’s favorite foods. I didn’t use any patterned paper on this page, but used stamps to create my own on the strips on the right hand side of the page.
LOAD Oct 27 2009
That’s all for now. I’ve got today’s page almost all done, I’m just waiting for the glitter glue to dry before I finish putting it together. Four more days, and LOAD will be done for October. It’s been a fun ride so far.

LOAD Week Two

Or perhaps this should be titled “Maintaining My Groove?”

At any rate, I began week two of LOAD with one of my favorite photos–a picture of Simon and I wearing Little MissMatched Socks. Four different and colorful socks makes me a happy camper. If you haven’t given yourself permission to wear mismatched socks, go check them out now. They’re too fun for words.

Ethan turned 8 on the ninth, and I decided to actually do a birthday page. I think this may be the second birthday page I’ve done, ever. What can I say, I don’t concentrate on events, but rather moments. As an aside, he would have been very unhappy if he had not gotten any legos. When I saw the little guy holding up the page below, I knew that set was for Ethan. The lego figure even looked like him, don’t you think?

I put this page together while working the table at my local Joann’s for the meet the teachers open house they do every month. I think it may be a little bare, but I’m not going to waste my time second guessing myself. Moving on…


This photo was taken by a family friend (Hi Marios!) I used paper and stickers from DCWV, and I love how they all go together.


Next I used some new papers I got in my order from Scenic Route. They are going out of business (sniff), so if you like these papers, order some quick. When they’re gone, they’re gone!

These are the first two pages in my Me:The Abridged Version book. The design is by Cathy Zielske, and she put together a great class teaching this at Big Picture Scrapbooking. Even if you don’t take a class from her, you should make a book like this. It will change the way you see yourself, and how your family sees you.


This page I did NOT do for LOAD. I made this at the beginning of the year as a memento for choosing the word “JOY” as my word of the year. This is something Ali Edwards talks about, and it’s a great idea for bringing mindfulness to your life.

The prompt for yesterday was to revisit your word of the year, if you had picked one, and make a page about it. This is what I came up with. Hankies may be necessary.

I finished off the week on a decidedly cheerier note, with a photo Simon took of me last spring, and a bunch of silly quotes I like to use.


So that’s it for this week. Seven layouts, and nine pages, for a total of 34 pages this month. Woo hoo! Nothing like list making to make you feel more productive 🙂

The Perils of Pioneer Woman

When you read Pioneer Woman as often as possible (which I do) you tend to get your camera out more often. You read the manual. You make your kids pose for 49 pictures at a time. You scan your house for the best possible natural light. But there are times when you may take your Pioneer Woman addiction too far. Times when the macro function on your little point & shoot camera has no business being used.

Like when you’re in the middle of cutting up a butternut squash from a friend’s garden to try in a untested recipe, and you decide the light is really nice, maybe you’ll just try for a little close up on the squash. And you get this:

I’m not sure if this is really good, or really scary.

My first week of LOAD

I’ve managed to keep up with a layout a day for the first week of October (and then some!) My first page, inspired by a chance watching of The View, and recalling meeting Whoopi Goldberg:

I even dreamed about making that one. Day two I got out the stamps, and then proceeded to mess up the title. Oh well. This isn’t for publication, but for fun!
That’s one of my favorite photos of Ethan as a baby. Day three, and I needed something quick, since we were busy going to a concert. Cue the dog pictures, and color-blocked paper:
Day four, and I wasn’t sure what I should do, and then Simon suggested working on my zoo pictures. I’ve only had a plan for these since 2004. I did four pages (6×6) since they’re so small.
Bite-sized even!

Day five was more of the same: Simon helped me do 6 more pages for the mini zoo book by putting on the flowers and buttons.

I decided I wanted to do the prompt for the day as well, which encouraged using fall colors, so I did my first, quick, completely digital page. Now I just have to get some 8.5×11 photo paper.


Day six, and Simon and I finished up the mini zoo book. That’s ten pages for you.
Day seven, and I used one of the leftover zoo pics to do a page about my favorite sister. (Hi Jess!)So that’s 25 pages done so far this month. I rock! (If I do say so myself.) More next week 🙂

On your mark…

I signed up to do a Layout A Day for the month of October. That’s LOAD to you 😉 That’s a scrapbook page every day of October. Even the days I’m teaching, or celebrating my darling sister’s graduation from PA school, or wandering the neighborhood trick-or-treating. Just the idea of this makes me happy, simply because I will have 31 more pages of my story done.
And by my story, I don’t just mean pages about me, although there will be plenty of those, but also pages about my lovely children and my goofy husband and the rest of my wonderful family. The idea of having physical reminders of how much I love these people just fills me with JOY. That is my word for the year–to share joy and spread joy, and find joy in the everyday.
So are you ready? Do you have a story to tell?
Get set…
Go!

Growing Up

All of a sudden, the house is quiet for hours at a time. I thought I was more than ready for you to start school, but I miss you. You are racing into the future, and all I can do is watch you go.
As I walked you to school for your second day, you looked up at me and said, “I love you Mama,” and then smiled that all encompassing smile that you have when you are completely happy. I just wanted to freeze that moment forever.
So here’s to the wonderful boy you are becoming. I love you, too.

Home

I’ve recently been expanding my scrap blog reading, and came upon Lain Ehmann’s blog called ScrapHappy. She recently posted about what “home” means, and quoted a line from Finding Nemo: “I look at you, and I’m home.” Then she challenged others to make a page using that as the inspiration point.

Since the simple idea of it got me all teary eyed, I started thumbing thru photos, and came upon one of my guys all together and smiley in the back seat of my mother’s car. So here’s the layout I made with Lain’s inspiration:

I used some of my favorite products: flowers from making memories and close to my heart, tim holtz’ grungeboard and distress stickles. The patterned paper is from DCWV’s sweet stack, I believe. I think it looks like chocolate cake, how about you?

So, what makes you think of home? Is it a person, a place, a smell? Cleaning out my mother-in-law’s house has made me a little more aware of what makes me think of home.

Little gift folder/card

I made some cute little gift cards for my relatives for Valentine’s day. (With some help from my youngest.) I thought I’d show you how to make them, since they’re so easy and cute. (I wonder how many times I can say “cute” in this post?)

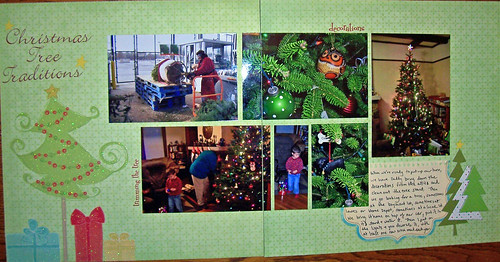
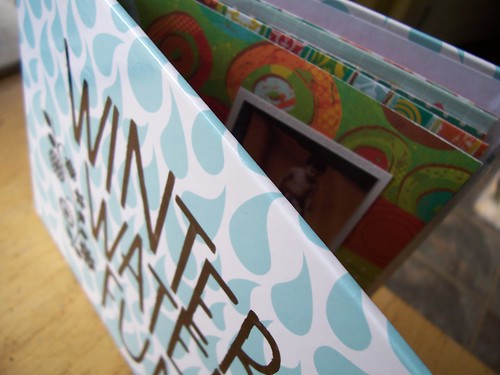
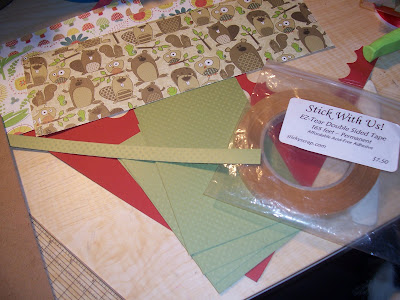
I used the new Green paper stack from DCWV for the ones I sent my relatives, with dotted swiss bazzill paper as the inside page. The final one you’ll see here I made with scraps when I realized I hadn’t taken any pictures of the finished product. I’ll think of someone to send it to, I’m sure.

You will also need a strong double sided adhesive, like redline, or stick-ease. I’m not sure a regular tape runner is strong enough to hold the pockets shut. (I used tombow on some we made for my son’s class, and they did not stay put.) And of course you’ll need a trimmer, straight edge (aka ruler), craft knife, and a bone folder or stylus, as well as a long reach hole punch. And stamps, stickers, or photos that you love.

Start by cutting off a four-inch strip from a piece of 12X12 cardstock. I wasn’t too concerned about how “finished” the inside would look, since I knew it would be filled with pages and candy, but that may concern you, and you may want to use something double sided.

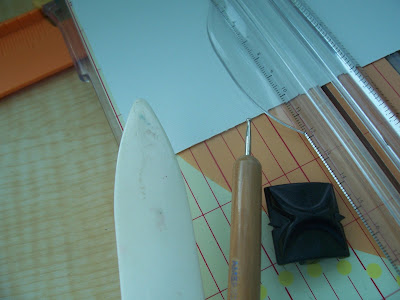
Just as an illustration, the above items are a bone folder, stylus, and scoring blade for the fiskar’s trimmer I was using. Any of these will work to score folding lines in your paper. You want to score three lines across your paper strip, one in the middle, at 6 inches, and one at 2 15/16 inches from each end. 
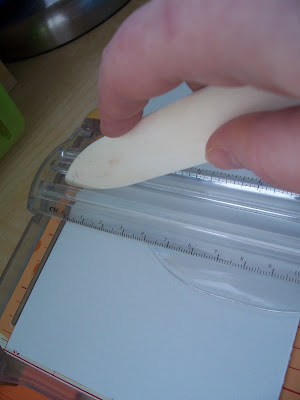
Just run your bone folder, stylus or scoring blade down the center channel of your trimmer. I prefer my bone folder because I can be rather heavy handed, and have been known to break through the paper when using the scoring cartridge.

For those of you who are mathematically challenged, here’s 2 15/16 inches:

I hope that helped 😀

Next you’re going to cut off the top outside corner of each end. You could just fold the corner under (I’d use a glue dot to hold the corner down) but I wanted to make these as light as possible since I was going to mail these all over the eastern seaboard.

The next step may require a little help. Stamp, sticker, or otherwise embellish a 4X6 piece of solid colored cardstock, and score a line down the center (at the 3 inch mark if you need specifics). This is where my little helper came in. For any family reading this, each of your pages tells a complete story. I have no idea what the story was; you’d have to ask Simon.

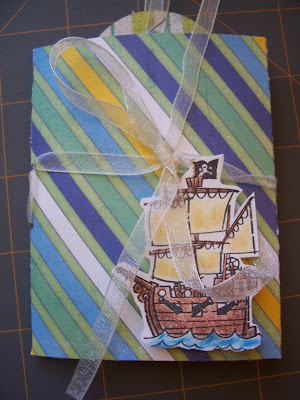
Then run a piece of double sided adhesive along the edge of the flap, and tape down. Voila! You’ve got a little two pocket folder. It’s not quite big enough for school work, however. I put a piece of candy and a bookmark in each pocket after I finished assembling the card, but gift cards or love notes might work too.


To assemble, place your decorated 4X6 piece of cardstock inside the folder, and punch two holes just a bit above and below the center point. I wasn’t too exact here, I just wanted a little distance between the holes so they acted as a hinge, rather than a pivot point. From the outside, thread a piece of thin ribbon through each hole, then back out the other hole. Tie together and you’ve got a cute little package for someone special. I also added a little heart on a pop dot to the front of our valentine’s cards, but I think this pirate’s ship is pretty cute, don’t you? It’s from TAC.

I hope you’ll try to make one. It would make a great holder for a gift card or cash for a graduation or wedding present as well. Have fun creating!